How to Set Up Automated Workspaces on Mac
I spent several minutes every morning opening the same apps, dragging windows into place, checking messages, arranging browser tabs, and preparing my desktop before real work even started. That small routine felt harmless, but over time, it turned into a daily productivity leak. Once I learned How to Set Up Automated Workspaces on Mac, my workday became cleaner, faster, and far less distracting.
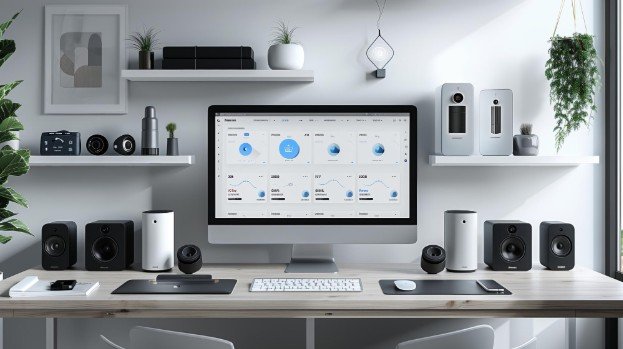
An automated workspace is not just a neat desktop. It is a repeatable setup where the right apps, windows, tabs, Focus settings, and desktops are ready for a specific task. Whether you write, design, code, manage meetings, research, or handle client work, automated Mac workspaces help you move into work mode without rebuilding your screen again and again.
What Is an Automated Workspace on Mac?
An automated workspace on Mac is a saved or repeatable work environment for a specific activity. For example, a writing workspace may include Safari, Notes, Pages, and a research folder. A meeting workspace may include Zoom, Calendar, Notes, and a browser window. A design workspace may include Figma, Finder, reference images, and communication tools.
The main goal is simple: change hardware settings on mac. Instead of starting from a messy desktop, you can create a system that keeps your apps and windows organized by purpose. This is especially useful for people who switch between tasks throughout the day.
Built-in macOS tools can help you create basic workspaces, while dedicated window layout apps can make the setup more consistent. The right approach depends on how much control you need.
Why Automated Mac Workspaces Improve Productivity
Most Mac users lose time because their desktop changes constantly. Apps open in random places, browser windows pile up, messages interrupt focused work, and important files get buried behind other windows.
Automated workspaces solve this by giving each type of work its own structure. You can keep research separate from meetings, creative work separate from admin tasks, and personal browsing away from professional screens.
This also helps with focus. When your screen only shows the tools needed for the current task, you make fewer unnecessary clicks. You also avoid the mental drag of deciding where everything should go each time you start.
Use Spaces to Separate Work Modes

Spaces is one of the most useful native macOS features for workspace organization. It lets you create multiple desktops and move between them using Mission Control.
You can create one Space for writing, one for meetings, one for research, and one for communication. This keeps unrelated apps away from your active work area.
To create a Space, open Mission Control, move your pointer to the top of the screen, and add a new desktop. Once you have multiple Spaces, you can drag windows into the right desktop and switch between them using trackpad gestures or keyboard shortcuts.
For a better setup, assign certain apps to specific desktops. Right-click an app in the Dock, choose Options, and assign it to a desktop. This helps apps open in the same area each time.
Use Stage Manager for Active App Groups
Stage Manager is helpful when you want to group active apps and reduce clutter. It keeps your current window in the center and places other recent apps along the side.
This works well for people who switch between small groups of apps. For example, you can keep a browser and notes together for research, then switch to a meeting group with Zoom and Calendar.
However, Stage Manager is not full automation. It helps organize active windows, but it does not always restore a complete workspace exactly the way you want. That is why it works best when combined with Spaces, Focus modes, and window layout tools.
Use Focus Modes for Cleaner Workspaces
Focus modes are perfect for controlling notifications during different work sessions. You can create Focus settings for writing, meetings, deep work, or personal time.
A writing Focus can silence chat notifications. A meeting Focus can allow only calendar alerts. A research Focus can reduce social distractions while keeping useful apps available.
This adds another layer to your workspace. Your Mac is not only visually organized, but also mentally quieter. When Focus works with Spaces and app layouts, each workspace feels more intentional.
Use Shortcuts to Open Apps Faster
The Shortcuts app can help you launch several apps at once. You can build a shortcut that opens Safari, Notes, Calendar, Finder, or any tools you use daily.
This is useful for starting your workspace quickly. Instead of opening apps one by one, you can trigger a shortcut and prepare your setup in seconds.
Shortcuts can open apps and files, but it may not always place windows exactly where you want them. For simple routines, it works well. For advanced layouts, you may need a Mac window management app.
How to Build a Practical Automated Workspace
Start by choosing your main workspace types. Do not create too many at once. Most people only need three or four: writing, meetings, research, and admin work.
Next, create separate Spaces for each work type. Move the right apps into each desktop and assign important apps to their preferred Space.
Then arrange windows based on how you work. Keep your main task in the center. Place reference material on one side and communication tools on the other. If you use multiple monitors, decide which screen should hold active work and which should hold supporting apps.
After that, add Focus modes to match each workspace. This makes the setup more complete because your notifications match your task.
Finally, use a layout tool if you want stronger control over window positions. This is where apps like GridSutra, Moom, Rectangle Pro, and Keyboard Maestro become useful.
Best Apps for Automated Mac Workspaces
GridSutra is useful for users who want custom window layouts and a cleaner desktop workflow. It fits naturally into a productivity setup because it helps arrange, position, and manage windows without wasting time on manual resizing.
Moom is another strong option for users who want saved window layouts and quick resizing controls. It is especially useful when you regularly return to the same app arrangement.
Keyboard Maestro is best for power users who want deeper automation. It can launch apps, run macros, open documents, and control window behavior in more advanced ways.
The best choice depends on your workflow. If you only need simple snapping, a basic window manager may be enough. If you want repeatable work environments, choose a tool that supports custom layouts or automation.
Automated Workspace Examples
A writing workspace can include Safari on one side, Notes beside it, and a document editor in the main area. This keeps research and writing connected without filling the screen with extra apps.
A meeting workspace can include Zoom, Calendar, Notes, and a browser tab for agenda items. This makes you look prepared and keeps private apps out of view before screen sharing.
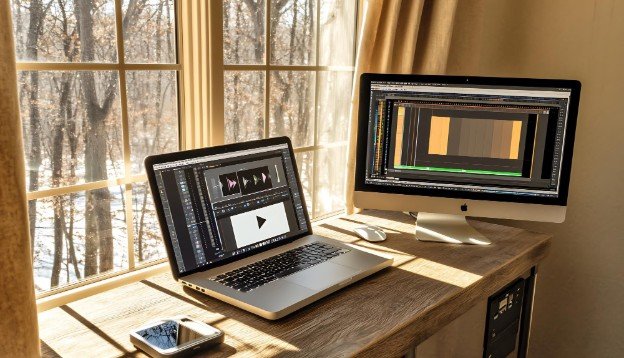
A coding workspace can include Terminal, a code editor, documentation, and a browser preview. This setup helps developers avoid constant app switching.
A research workspace can include multiple browser windows, PDFs, notes, and a spreadsheet. Keeping these tools together makes information easier to compare.
Common Problems With Mac Workspace Automation
One common issue is that windows may reopen in the wrong place. This can happen when you disconnect an external monitor, restart your Mac, or move between Spaces.
Another issue is full-screen apps. Full-screen mode creates its own Space, which may disrupt your planned layout. For many workflows, tiled or resized windows are more flexible than full-screen apps.
Stage Manager can also feel inconsistent if you expect it to behave like a saved workspace system. It is better for grouping active apps than restoring complete layouts.
Multi-monitor users may need extra setup. Apps may open on the wrong display unless you keep monitor positions consistent and use a reliable layout tool.
Tips to Keep Your Workspaces Clean
Keep your setup simple. Too many Spaces can become confusing. Start with your most repeated workflows and improve them slowly.
Use clear patterns. Keep your main work in the center, references on the side, and communication tools away from your focused area.
Review your setup every few weeks. If a workspace no longer matches your routine, update it. Good automation should support your habits, not make your Mac harder to use.
Frequently Asked Questions
1. What is the easiest way to automate workspaces on Mac?
The easiest way is to combine Spaces, Focus modes, app assignments, and a window layout tool. This gives you better control without making the setup too complicated.
2. Can macOS save complete window layouts by default?
macOS can remember some app and desktop behavior, but it does not always save complete multi-app window layouts perfectly. A dedicated layout app gives better results.
3. Is Stage Manager enough for automated workspaces?
Stage Manager is useful for grouping apps, but it is not enough for full workspace automation. It works best with Spaces, Focus, Shortcuts, and layout tools.
4. How to Set Up Automated Workspaces on Mac for multiple monitors?
Create separate work zones for each display, keep your main task on the primary monitor, place references or communication tools on the second screen, and use a layout app to restore positions faster.
Final Thoughts
I believe automated workspaces are one of the simplest ways to make a Mac feel faster without buying new hardware. When your apps, windows, desktops, and notifications already match your task, you start work with less friction and more focus.
The best setup does not need to be complicated. Start with Spaces, add Focus modes, use Shortcuts for app launching, and bring in a window layout tool when you need more control. Once you understand How to Set Up Automated Workspaces on Mac, your desktop stops feeling messy and starts working like a real productivity system.